Showing posts with label techniques. Show all posts

Friday, 15 September 2017

Time management in Felting

It's a bit of joke, of course :) !
As the most of crafts the felting is a very time consuming hobby and there is a very little you could do to make it easier. And still! If you felt purely for hobby reason you can skip this post straight away. If you, like myself, not only make but sell sometimes and know about pre-fair frenzy and shortage of time - you may find it useful.
At first I pinpoint the part of felting process which is the most tiresome or annoying. It could be very individual, some felters do not enjoy rolling, but rolling is fine with me because I usually listen to some book or workshop on youtube while rolling. My weakest points are preparing everything at the beginning (and putting everything back!) and laying the wool.
For large fairs I need to make a lot of small items, very often in the same design but slightly individual still. I prefer to layout a few in one go because it saves me time on preparation and on choosing and getting out the boxes with the colours needed and so on. I can lay out a few items in the same design, say, with poppies - glasses cases, Kindle covers, tea cosies and so on. They are all different in pictures and scales but I use the same colours and similar compositions. I prefer to do the layouts one day and the felting the next day or even after whenever I have a few spare hours. One very intense and messy day of layout and felting and finishing later.
The same with scarves, especially if they are of medium size - I can lay out two one day and then roll them together in one roll the next day. It will not save me a huge amount of time, but it will reduce the mess and give me more flexibility with my time.
Of course it doesn't work for a large one off pieces when I need to focus on it entirely.
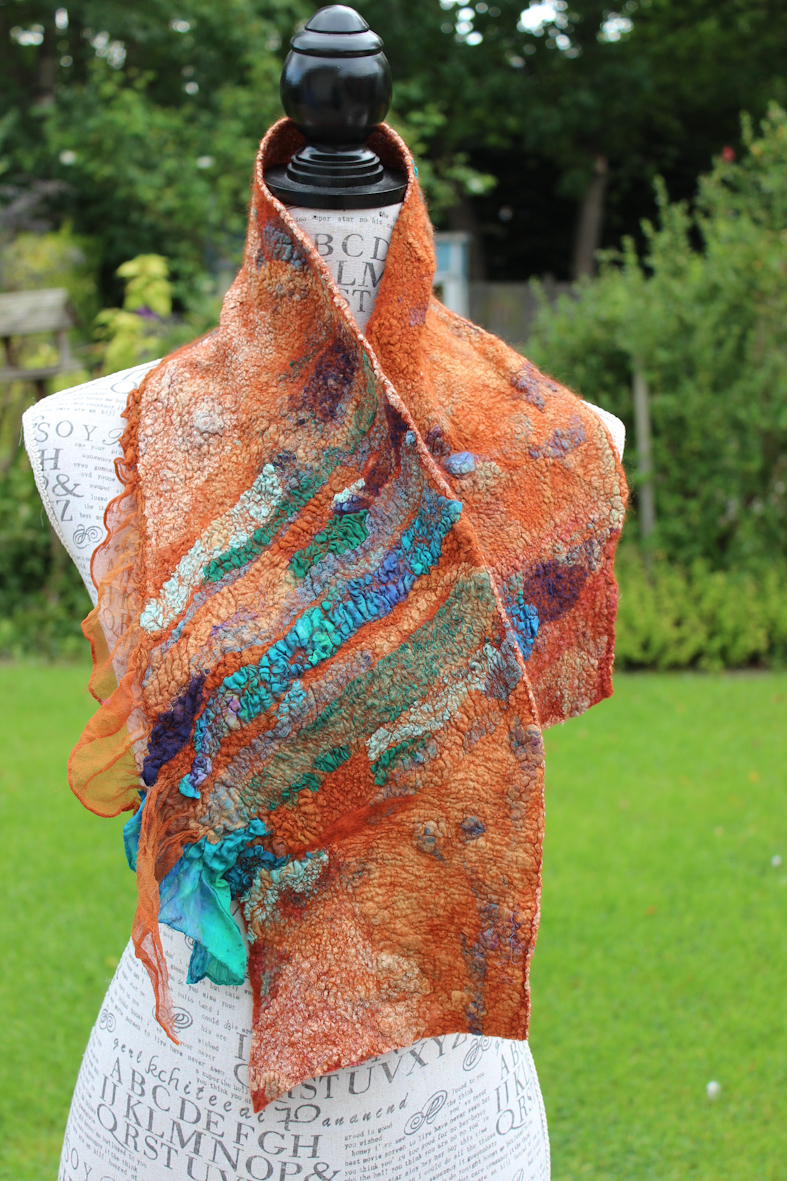
As an example - I was working on pictures (they are relatively small) and laid out some small items in the similar design:


Wednesday, 6 September 2017

Feeling grumpy today (and often!) about Facebook! At first it's always large bold font for short posts! OK, I managed to cheat to avoid this nuisance. Then they offer you to make a background of the post in colours! Now my page is screaming with posts in large bold letters on the acid green/yellow colour! And they are mostly about the very trivial stuff. I do not mind people complaining about the weather but not that loud please! I know that I could unfollow some friends to stop seeing their posts and I did it twice (when some become overly political) but always with a heavy heart.
Back to more cheerful things!
I've tried using the technique of making textured felt in scarves. See two of my first tries. They are very similar in colours and materials, more samples than finished pieces but I hope to make them proper pieces.


Wednesday, 1 June 2016

New Delivery

This scarf was made without a wool layer, just pre-yarn and silk fibre on the top. No good, too many holes and the holes are too large!
 
I tried to rescue it and added a very thin layer of carded merino on one side. Not the tops but carded one because I thought it would catch better with already felted pre-yarn. Here is a result:

 
It's more solid now which may be a disadvantage but adding another layer of dyed wool created more interesting play of colours.
 

 Anyway, I like it better now!

And see what I've got just delivered:

 There is nothing to stop me now!

Tuesday, 31 May 2016

Experiments with crazy wool technique

I continue my experiments with thin rovings and crazy wool technique. This time I used rainbow coloured ball (at the bottom of picture):
 
The roving/pre-yarn I work with is much thinner than standard pencil roving:

 
 The technique is the same as earlier: the layer of roving, very thin layer of matching merino, another layer of roving and generous layers of silk/viscose fibres in matching colours on both sides.
The result:


I'm quite happy with colours and the sheen:

This is how thin and holey the scarf is:

I'm still struggling to find a thickness I'm happy with, so you are to see more experiments!
 

Sunday, 22 May 2016

Crazy Wool Scarf

I've seen a lot of scarves made in the "crazy wool" technique recently - on Facebook and forums. I've made one myself, using pencil roving, some yarn, a bit of viscose and silk fibres and VERY thin layer of fine merino. The weight is 64g, it's 165cm long and 38 cm wide.

It looked underfelted to me and I worked with it some more. I wanted it to become narrow as a scarf not as a wrap. Now it's 162 cm long and 32 cm wide.
In both pairs of pictures the top one is original and the bottom one is after additional felting. Not much difference on the pictures but the feel of the scarf changed - it become more substantial, like proper scarf and extra delicacy's gone. Do I like it more now - there is a question... 


Friday, 13 May 2016

Back from FELTROSA!

I'm back from Italy where I spent a week  - three days in Verona and four days in small town Mel where the annual felting festival Feltrosa was held this year.
How was it? It was good even if I've heard some opinion that previous events had more interesting programme and were better organized. I couldn't compare because it was my first time and I couldn't complain - beautiful scenery, glorious weather and Italian food made up for all the shortcomings many times over.
I'm a felter still so the main reason (or excuse?) to go there was to see felt, workshops and take part in one of them. There were three workshops I've seen:
 - small jacket, 2-days workshop run by Natalia Shvets. As expected the "small" jacket became "full size" jacket and it took much longer and I've not seen the finished result unfortunately. Natalia wrote her own report on Feltrosa, it's in Russian but with many informative pictures - HERE 
- two one-day workshops on toques and fascinators run by Italian feltmaker Karin Monica. Small hats were presented in such a variety and made with such taste and fantasy that it was the best course in my opinion! See some pictures below. These hats were made by tutor but students' works were of the same high quality!


I attended the short  half day workshop on technique when you make digital print on silk fabric and could felt it in to create fully felted piece. Unfortunately it was a disappointment - both digital images I worked with disappeared completely by the end of felting process and I was left with blank piece of prefelt. The other participants got very mixed results as well... I was rather upset at first, then considered it as a new experience!
To finish it on more optimistic note there is a picture of lovely green heart one of Mel's resident created to his mother by carefully planting and pruning large ivy plant!
 
UPD: I've found the picture of a good result achieved by one of students, the image of daisies is a digital print:
 Unfortunately, I can't show mine because it was completely blank, no slightest image left...

Friday, 1 April 2016

Talk on design and composition of felted wraps. Part 3 - Dynamics and Movement

This is Part 3 of a translated transcript of the Russian felt artist Maria Gladchenko talk.
 https://www.facebook.com/maria.gladchenko?fref=ts    http://www.livemaster.ru/madsilkworm 
Part 1 - is Here  
Part 2 is Here

 In Part 3 she is talking  about Dynamics and Movement.

If we want to use a lot of small elements in our wrap and create well balanced piece we need to arrange the bits properly, give them direction and create flow and movement.


We need to be sure that this multitude of small elements is not positioned randomly or just thrown together but arranged so that all of them have got general direction in common, a flow similar to some nature phenomenon like fluid and harmonious movement of shoal of tiny fish.


The dynamic is always associated with organic movement of life and nature in contrast to static and geometrical compositions which are often considered as artificial and somewhat industrial. Fluid movement of the nature is the source of our inspiration.
 

This picture of a beautiful maple tree may look as a random array of small elements but it’s just at first glance.
There are a few centres from which the elements are spreading in groups and in different directions. Every branch is equivalent to a group of similar elements with their own directions of movement. We could do the same in our composition of the wrap, we group details.   At first we define the position of the centres of the flow – the largest or the brightest or the most prominent element.

This arrangement should be done according to the same recommendations as above ( avoid stark symmetry, consider how it’ll look wrapped, balance…)  When we decided on the position of the main central elements we can start filling the entire surface of our piece working with the array of small elements.
Here the small leaves follow the lines of the wrap folded around the figure adding the softness and feminine feel.
 

To create more dramatic impression and add more energy to our composition we can use more vibrant elements like this spiral design with the centre of the spiral positioned just off geometrical centre of the wrap.

 
And here is a finished piece in all its glory!
 
                                                                    The End!
I'd like to thank Maria again for the generosity in sharing her knowledge and experience! 

Talk on design and composition of felted wraps. Part 2 - Balance and Symmetry


This is Part 2 of a translated transcript of the Russian felt artist Maria Gladchenko talk.
 https://www.facebook.com/maria.gladchenko?fref=ts    http://www.livemaster.ru/madsilkworm 
Part 1 - is Here  

 In Part 2 she is talking about scale, balance and symmetry.

Now let’s talk about the wraps designed without any borders, where the central area is the main feature of design and creates major visual impact. The rectangular shape of wrap or scarf may deceive you and create an illusion of being a picture. Pretend to be a picture it persuades you to fill the whole space of the wrap and create a real picture like a piece of fine art. But you need to be warned that the wrap is not a picture in this context. And it can’t be.
Let’s have a look at this wrap as a very good example.


It was inspired by world known work of Vincent Van Gogh. Despite obvious similarity it’s not a literal copy. The colours and style are very similar but there is no such thing as a horizon line and no cypress trees. Why?  When the wrap is draped around the shoulders the dark spots of trees will be positioned at wrong place and the distinctive shape of the trees will be distorted and unrecognisable and look just as splash of dark colour.
The same it’s true when the entire space of the item is occupied with large single image of some face or figure and alike. After you place the wrap on the shoulders the images will not look as they intended to be. To illustrate it we show this beautiful piece with striking figure of panther.
 
When presented as a wall hanging it looks fantastic but in a wrap the cat’s figure is unrecognisable and looks rather awkward especially from the back

Apparently this interesting idea of creating a picture doesn’t always work!
But it could work – if we consider Scale first. It may work if there were a few much smaller cats’ figures instead of one very large one.
Now we see that there are two extremes – to use a very large single element or use a lot of very small elements. Both these ways could fail in creating beautiful item.  We need to find a proper Balance, balanced approach to design and composition of our piece. The mother-nature is always at hand to help! Look at this beautiful cat with marbled fur coat!

There is a variety of sizes of dark and light markings changing their shapes and creating a sense of movement and direction.
One of the Maria’s lovely pieces as an example of thoughtful approach and right choice of the elements’ scale


Another feature of the rectangular shape which could lead to wrong design is its symmetry. Very often it seems obvious that the design should be symmetrical with the compositional centre placed in the centre of the item.
We decided to create a symmetrical spiral. If it’s in the very centre it’ll draw all the attention to this point which is not very good actually. Even worse in reality it’ll never be at the geometrical centre. More often it will be off centre and create disproportion so it would be more practical and attractive if we position that spiral close to one end (a shoulder)
See this idea realised in this example:
 
So - when we are to create a symmetrical design on the central part of the wrap which will be on the back of human figure it’s better not to place large distinctive elements (geometrical or colourful) strictly symmetrical or in the very centre. It’s more advisable to position them off centre and in some random order.

But when symmetry works well? Imagine the design of the future wrap as follow

Lovely movement on the piece but if we place two extra very distinctive and symmetrical elements to the ends they will add emphasis and create the feel of finished piece
Another design approach is to make the ends completely different 
 
. And again it will look better if the dividing line is not in the middle but is slightly off centre

 
Or it could be the gradual change of colour


Part 3 - Dynamics and Movement - is Here, Part 1 - is Here